Example Asbestos Removal Projects in Union City

Every project below starts with a sample, and each one shows the building, the lab result, what happens next, the time it takes and an approximate cost. About three in ten Union City homes date from the 1970s, and Fremont and Newark add many houses from the 1960s and 1970s, so the examples are set in all three.

We made these examples up to show how jobs run; they are not past work, clients or addresses. The house ages, steps and prices in them reflect the East Bay today, so you can plan before asking for a quote.

Duct wrap removed before more attic insulation

Example project
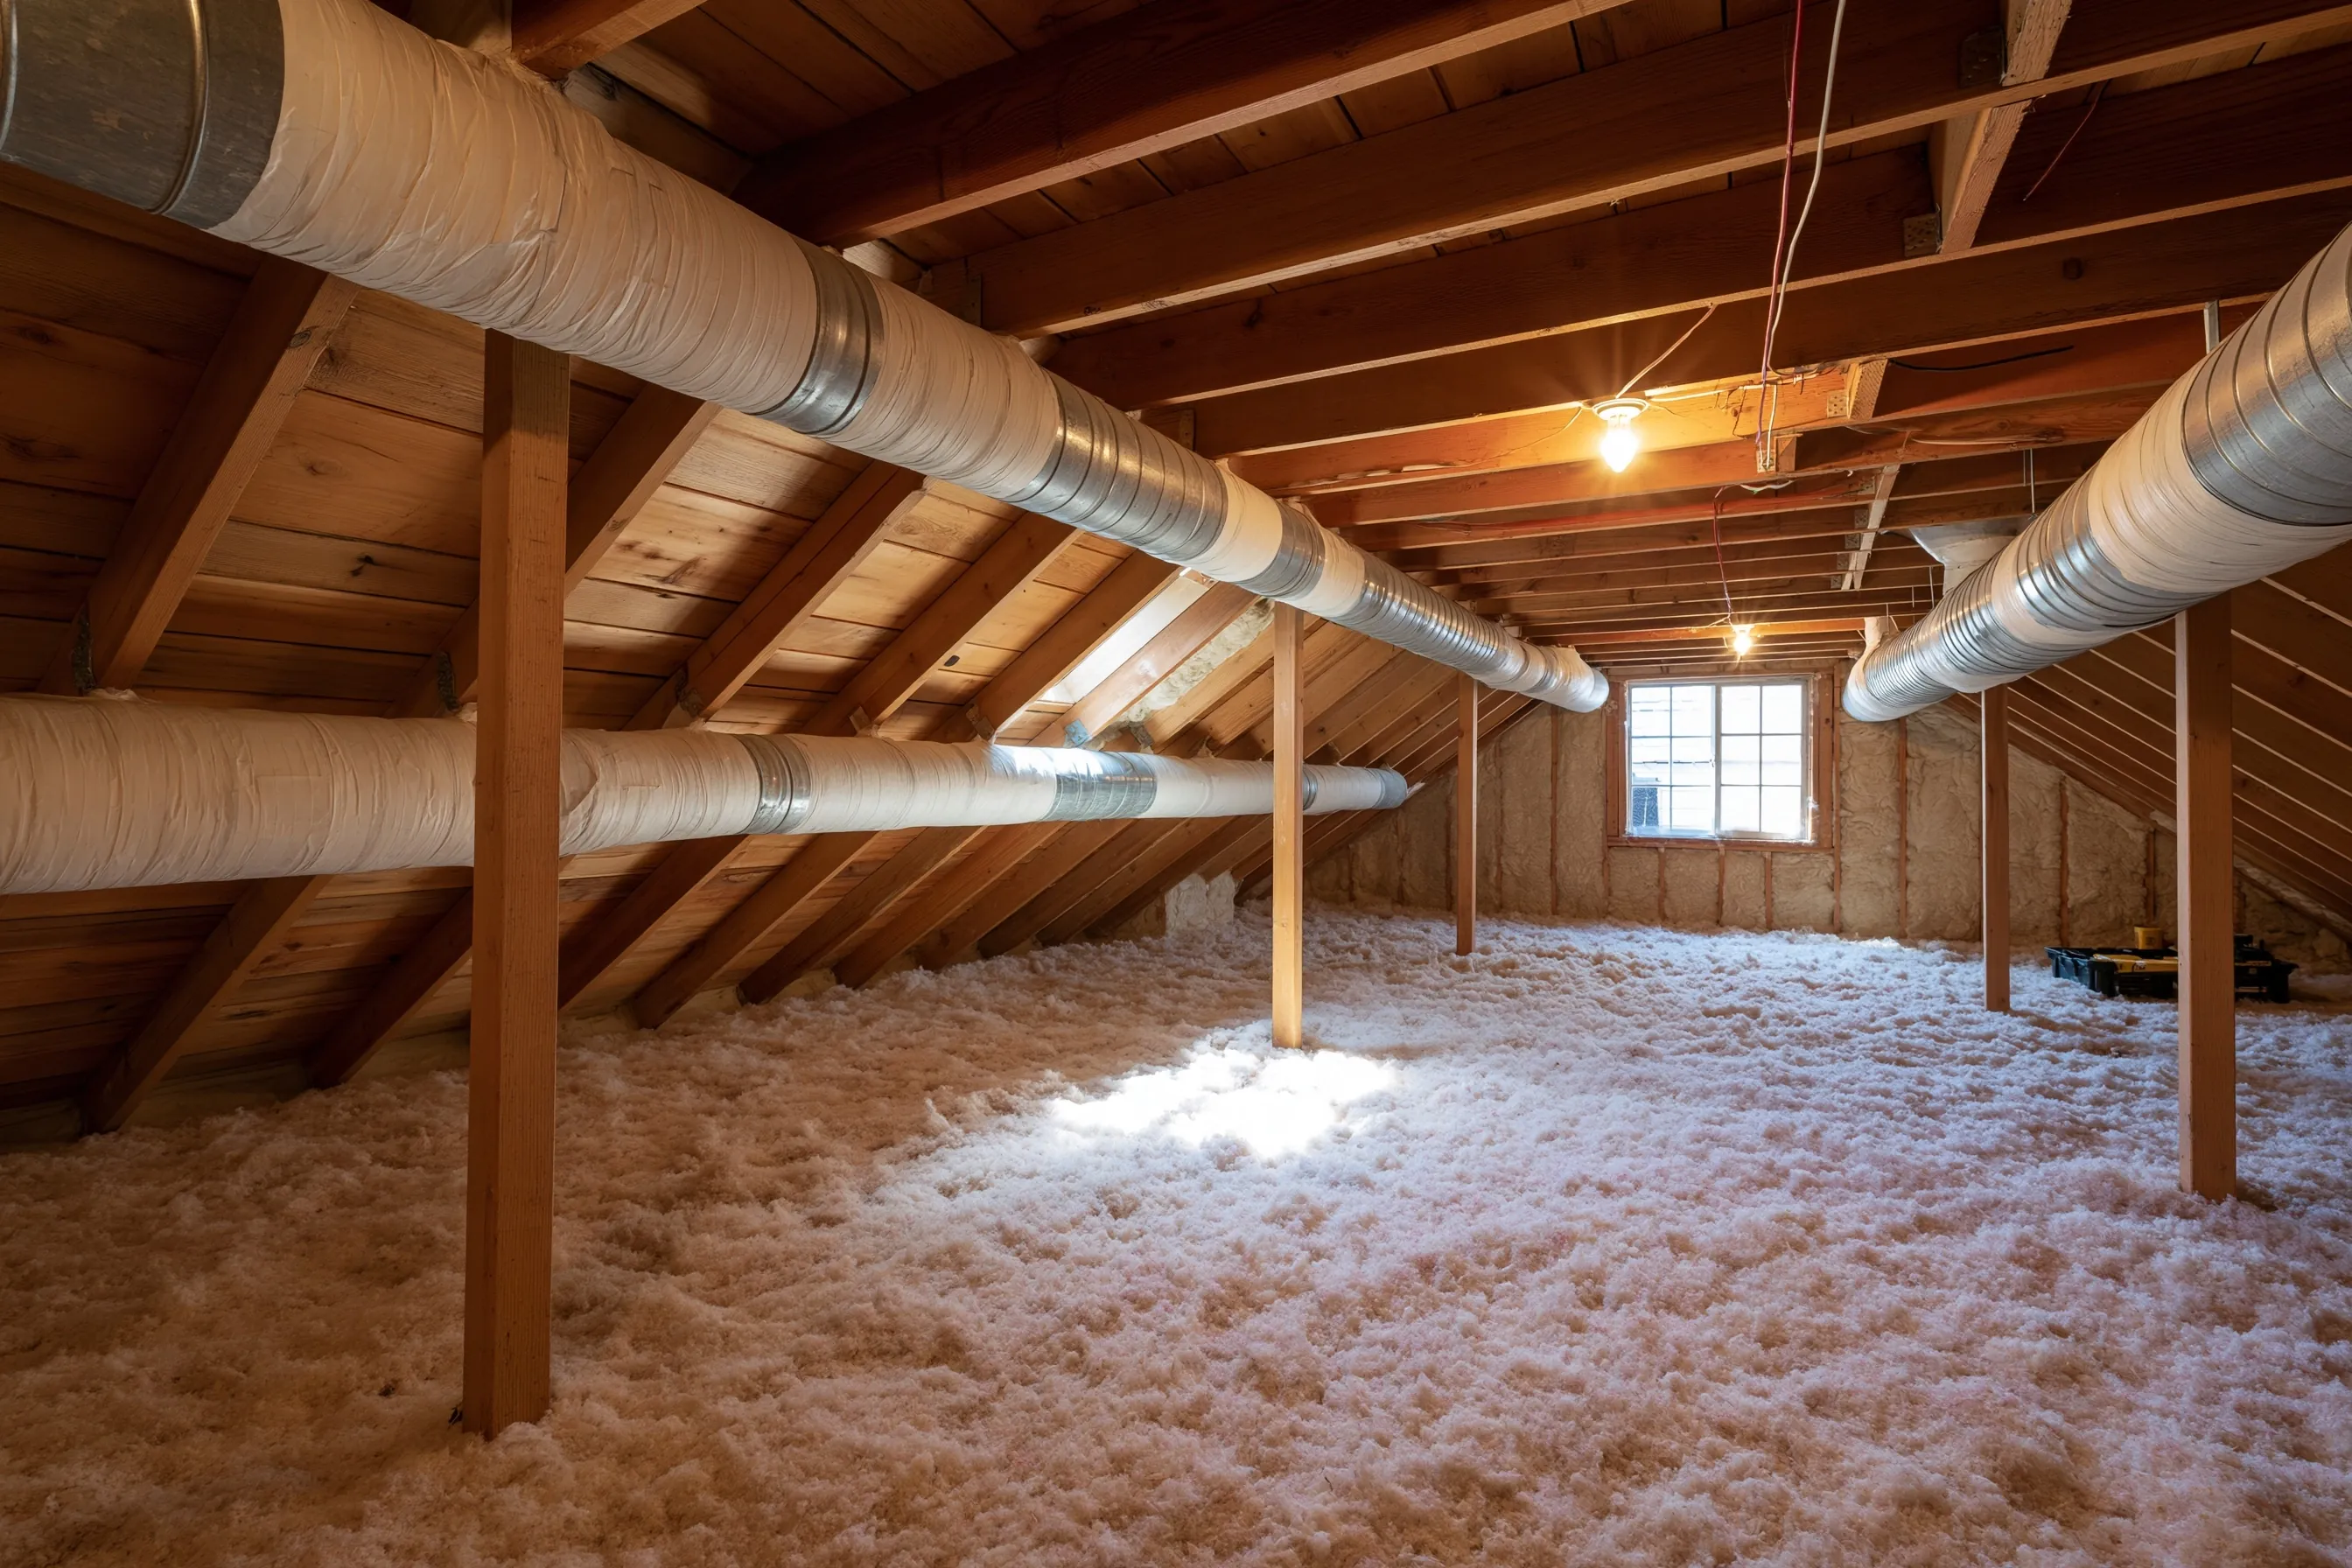
Attic with round metal ducts wrapped in white insulation and metal bands, board roof sheathing, a gable window and loose insulation on the floor
Home
1950s single-story house in Union City, with its ducts in the attic
Original request
Seal the ducts and add attic insulation after a home energy audit
Testing
Samples of the white duct wrap and the joint tape on the main runs
Found
Asbestos in the wrap and the tape; the loose insulation is clear
Work
About 50 linear ft of wrap and tape on the first runs out of the furnace, wet, in a sealed attic
Timeline
Lab results in a few days, then two days of removal before the insulation crew
Estimated cost
$3,100

Scope of work

Samples of the wrap, the tape and the loose insulation, a sealed work area in the attic with a filtered air unit, the wrap and tape on the first runs kept wet and cut away, sealed bags, a HEPA vacuum and disposal. The duct sealing and the new insulation are priced by the insulation contractor.

Project overview

In this example, the owners of a 1950s house in Union City get a home energy audit. The auditor finds round attic ducts wrapped in white insulation held with metal bands, and loose insulation over the floor. The owners want the ducts sealed and more insulation added.

The lab finds asbestos in the wrap and the joint tape, and none in the loose insulation. The crew takes the wrap and tape off the first runs out of the furnace, about 50 linear ft, wet and inside a sealed attic. That is under the 100 linear ft that needs a J#, so the insulation crew can start right after.

The goal

The goal is bare duct where the new seals and insulation will go, and an attic with no asbestos wrap left on the runs the work touches.

Process

  1. First visit Samples of the wrap, the tape and the loose insulation go to a lab, and the runs to be sealed are marked.
  2. Before work The insulation contractor holds the date until the removal is done.
  3. Day one Attic sealed, wrap and tape wetted and cut away from the first runs, then bagged.
  4. Day two Attic vacuumed and wiped, the plastic comes down, and the duct sealing can begin.

Planning right

  • Send the energy audit report with your request. It shows which runs the work will reach.
  • Wrap that is not touched can stay in place and be checked for damage.
  • Do not blow insulation over torn wrap. It buries the problem and spreads fibers.
  • Keep the lab report for the insulation contractor and for the next owner.

Get a free quoteMore about duct and furnace insulation removal
Kitchen and dining ceilings after a small kitchen fire

Example project

Home
1960s single-story house in Newark
Original request
Clean and repaint the kitchen and dining room ceilings after a small kitchen fire
Testing
Samples of the sprayed texture in the kitchen, the dining room and the hall
Found
Asbestos in all three samples
Area
About 240 sq ft of ceiling in the kitchen and dining room
Work
Texture soaked and scraped off with the soot on it, inside plastic with a filtered air unit
Timeline
J# wait of 10 working days, then two days of work
Estimated cost
$3,400

Scope of work

A lab test of the texture, the kitchen and dining room sealed with plastic and a filtered air unit, the texture wetted and scraped off with the soot film, sealed bags, a HEPA vacuum and wet wipe, and disposal. Add the J# fee from the price table. A skim coat, paint and the fire repairs are extra.

Project overview

In this example, a small kitchen fire leaves soot on the ceilings of a 1960s house in Newark. The cleaning crew plans to scrub and repaint, but scrubbing a sprayed ceiling breaks it up, so the owners have it tested first. The texture in the kitchen, the dining room and the hall comes back positive.

Instead of scrubbing, the texture comes off wet along with the soot. At about 240 sq ft it passes 100 sq ft, so a J# is filed and the crew starts 10 working days later. The hall ceiling, which the fire never touched, is left for another day.

The goal

The goal is bare ceilings with the soot and the asbestos texture gone together, ready for a skim coat.

Process

  1. First visit Samples from the kitchen, the dining room and the hall go to a lab, and the cleaning crew is told to wait.
  2. Ten working days The J# is filed while the lab results are read and the work is booked.
  3. Day one Both rooms sealed, texture and soot soaked and scraped off, bagged.
  4. Day two Rooms vacuumed and wiped, plastic down, and the ceilings are ready for a skim coat.

Planning right

  • Tell the insurance adjuster and the cleaning crew about the lab result before anyone scrubs.
  • Do not dry-brush or vacuum soot off a sprayed ceiling.
  • The hall ceiling can wait. Untouched texture is left in place.
  • Ask for the lab report and waste records for the insurance file.

Get a free quoteMore about popcorn ceiling removal

Half-wall taken out between a kitchen and a family room

Example project

Home
1970s single-story house in Union City
Original request
Take out the half-wall between the kitchen and the family room for an open plan
Testing
Samples of the wall texture and the joint compound on both sides of the half-wall
Found
Asbestos in the joint compound; the texture is clear
Opening
A wall about 10 ft long and 4 ft high, about 80 sq ft counting both faces
Work
Both faces taken down wet inside plastic, with a filtered air unit
Timeline
One day, ahead of the carpenter
Estimated cost
$2,400

Scope of work

Separate samples of the texture and the joint compound, plastic over the floors and doorways on both sides of the wall, a filtered air unit, both drywall faces taken down wet, sealed bags, a HEPA vacuum and wet wipe, and disposal. The framing, new drywall and paint are extra.

Project overview

In this example, the owners of a 1970s house in Union City want the half-wall between the kitchen and the family room gone. Before the carpenter touches it, the lab tests the texture and the joint compound on both sides. The compound is positive, and the texture is clear.

The drywall comes down wet and in pieces on both sides, inside plastic. The wall is about 80 sq ft counting both faces, under 100 sq ft, so no J# is needed. The carpenter takes out the framing the next morning.

The goal

The goal is an open wall line with the compound gone and no dust in the rest of the house.

Process

  1. First visit Samples of the texture and the compound from both faces go to a lab.
  2. Before work Plastic goes over the floors and doorways, and the filtered air unit is set up.
  3. Removal day Drywall on both faces wetted, cut and bagged, then the room is cleaned.
  4. Next day The carpenter takes out the framing and the new beam goes in.

Planning right

  • Texture and joint compound can test differently, so each gets its own sample.
  • Do not demolish a half-wall yourself. The dust travels through the whole house.
  • Let the carpenter and electrician mark any wires in the wall before the removal day.
  • Keep the lab report with the house papers for the next project.

Get a free quoteMore about wall texture and joint compound removal

Garage floor tile taken up before the garage becomes an ADU

Example project

Home
1970s single-story house in Union City, with a one-car garage
Original request
Turn the garage into an accessory dwelling unit with a new floor over the slab
Testing
The vinyl tile a previous owner laid on the slab and the black mastic under it, sampled separately
Found
Asbestos in the tile; the mastic is clear
Area
About 240 sq ft of tile glued straight to the concrete
Work
Tile lifted whole and wet, then the clear mastic scraped off the slab and bagged
Timeline
J# wait of 10 working days, then one long day of removal before the builder
Estimated cost
$4,300

Scope of work

A lab test of the tile and the mastic, the garage sealed with plastic, the tile lifted whole while kept wet and bagged as asbestos waste, the clear mastic scraped off the slab, a HEPA vacuum and wet wipe, and disposal. Add the J# fee from the price table. The new floor and the ADU work are extra.

Project overview

In this example, the owners of a 1970s house in Union City plan to turn the one-car garage into an accessory dwelling unit. A previous owner laid vinyl tile on the garage slab for a rec room, and the ADU plans call for a bare slab. The lab finds asbestos in the tile, but the black mastic under it tests clear.

Only the tile has to go as asbestos waste. It is kept wet and lifted whole, and the clear mastic is scraped off after it. At about 240 sq ft it passes 100 sq ft, so a J# is filed and the work starts 10 working days later. The builder gets a clean slab for the plans.

The goal

The goal is a bare, clean slab ready for the ADU builder, with the asbestos tile and mastic gone.

Process

  1. Test A tile and a scrape of mastic from the garage go to a lab, and the ADU designer gets a copy of the result.
  2. Morning The garage door is closed and sealed with plastic, and a filtered air unit is set up.
  3. Midday The tile is wetted and lifted whole, then bagged as it comes up.
  4. Afternoon The clear mastic is scraped off the slab, the garage is vacuumed and wiped, and the plastic comes down.

Planning right

  • Tell the ADU designer about the tile before the drawings are final.
  • A garage slab can hold older layers than the rest of the house. Test them all.
  • The tile and the mastic are separate samples, and here they gave different results.
  • A moisture test of the slab can wait until the mastic is gone.

Get a free quoteMore about floor tile and sheet vinyl removal

Asbestos removed from a house before it is torn down

Example project

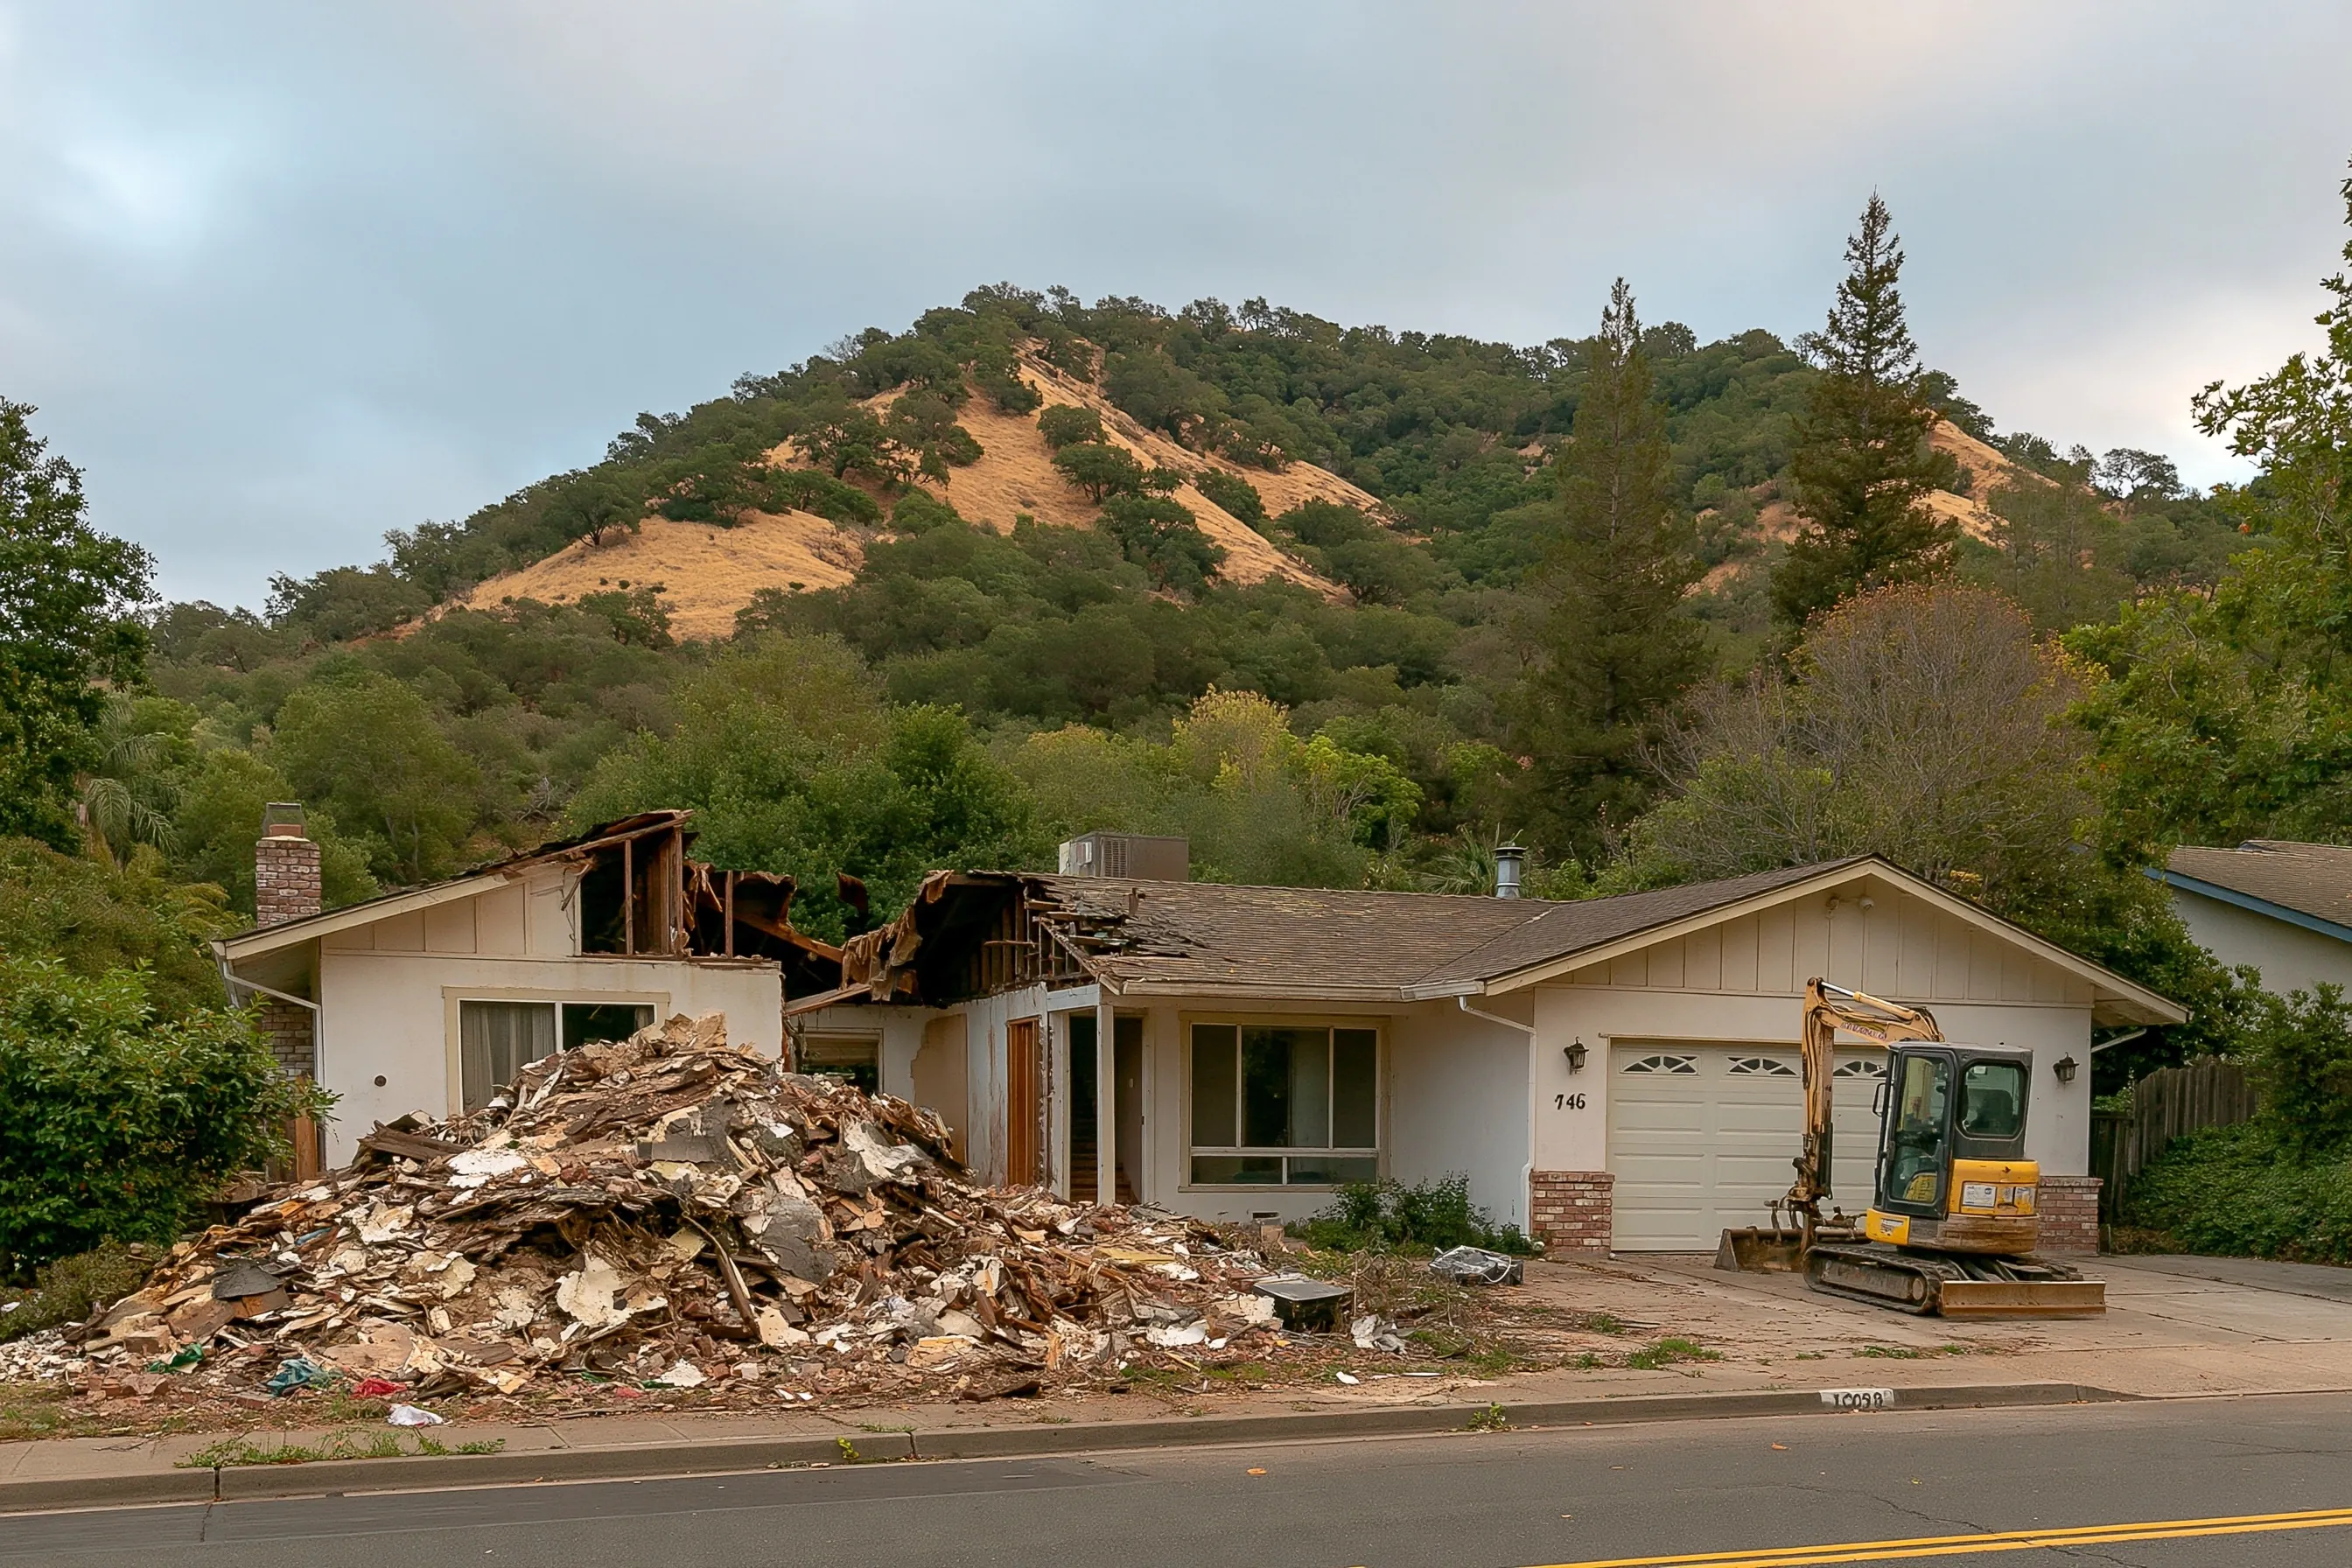
Single-story house with a two-car garage and brick planter at the foot of a wooded hill, one wing torn down, a debris pile in the front yard and a small excavator in the driveway
Home
1960s single-story house in Fremont, with a two-car garage and a brick planter, on a street at the foot of a wooded hill
Original request
Tear the house down for a new two-story home
Testing
Samples of the ceilings, wall finishes, floors, ducts and stucco
Found
Asbestos in the ceiling texture, the kitchen and bath floor tile with its mastic, and the wrap on the furnace duct; the stucco is clear
Work
Positive materials removed room by room inside plastic, then a clearance air test
Demolition
One wing is already down, with the debris piled in the front yard and a small excavator parked in the driveway
Timeline
Samples and J#, then about two weeks of removal before the excavator arrives
Estimated cost
$20,500

Scope of work

Samples of every material the plans will touch, J# notices for the removal and the demolition, each room sealed with plastic and filtered air, the ceiling texture scraped off wet, the floor tile and mastic taken up, the wrap cut off the furnace duct, sealed bags and shipment records, and a clearance air test. Add the J# fees from the price table. The demolition and the new house are priced by the builder.

Project overview

In this example, the owners of a 1960s house in Fremont are tearing it down to build a two-story home. Even with no asbestos, a house demolition needs a J#, and the house is sampled first. The lab finds asbestos in the ceiling texture, the kitchen and bath floor tile with its mastic, and the wrap on the furnace duct. The stucco is clear.

The positive materials come out room by room, wet and inside plastic, before the excavator arrives. The demolition has begun by the stage shown: one wing is down, the debris is piled in the front yard and a small excavator is parked in the driveway. The clearance air test is the paper the builder keeps for the permit file.

The goal

The goal is a house with every asbestos material out of it, so the demolition crew can work without stopping for more sampling.

Process

  1. Weeks one and two Samples from every room and the ducts, lab results, and the J# filed.
  2. Before work The builder and the removal crew agree the order of the rooms.
  3. About two weeks Room by room: sealed, stripped wet, bagged, cleaned.
  4. Last day Clearance air test, and the results go to the builder before the demolition.

Planning right

  • A J# is needed for the demolition itself, with or without asbestos.
  • Ask the City permit counter what the demolition needs. The J# is a separate filing.
  • Do not let the excavator start before the clearance result is in.
  • Keep the lab results and the clearance test together for the permit file.

Get a free quoteMore about addition, ADU and demolition abatement

Request a free asbestos removal quote

Tell us what the work involves, whether it is a house, a garage conversion or a larger building, roughly when it was built and whether anything has been tested. We'll get back to you soon with an estimate or any questions we have. Estimates are free and there's no obligation.

Call (510) 767-0502

Call (510) 767-0502